Documentation Index
Fetch the complete documentation index at: https://docs.shadeform.ai/llms.txt
Use this file to discover all available pages before exploring further.
Launch GPUs through the Shadeform Console
1. Creating an account
Get started using Shadeform by going to Shadeform.ai and clicking “Sign up for free”. Once you sign up, you’ll be prompted to enter your first name, last name, and organization info.2. Finding the right GPU
Once you have created an account and filled out the first time login form, you can go to the Marketplace to look at all GPUs available to launch. The drop downs in the top right corner allows you to filter by GPU type, number of GPUs in an instance, and the interconnect type.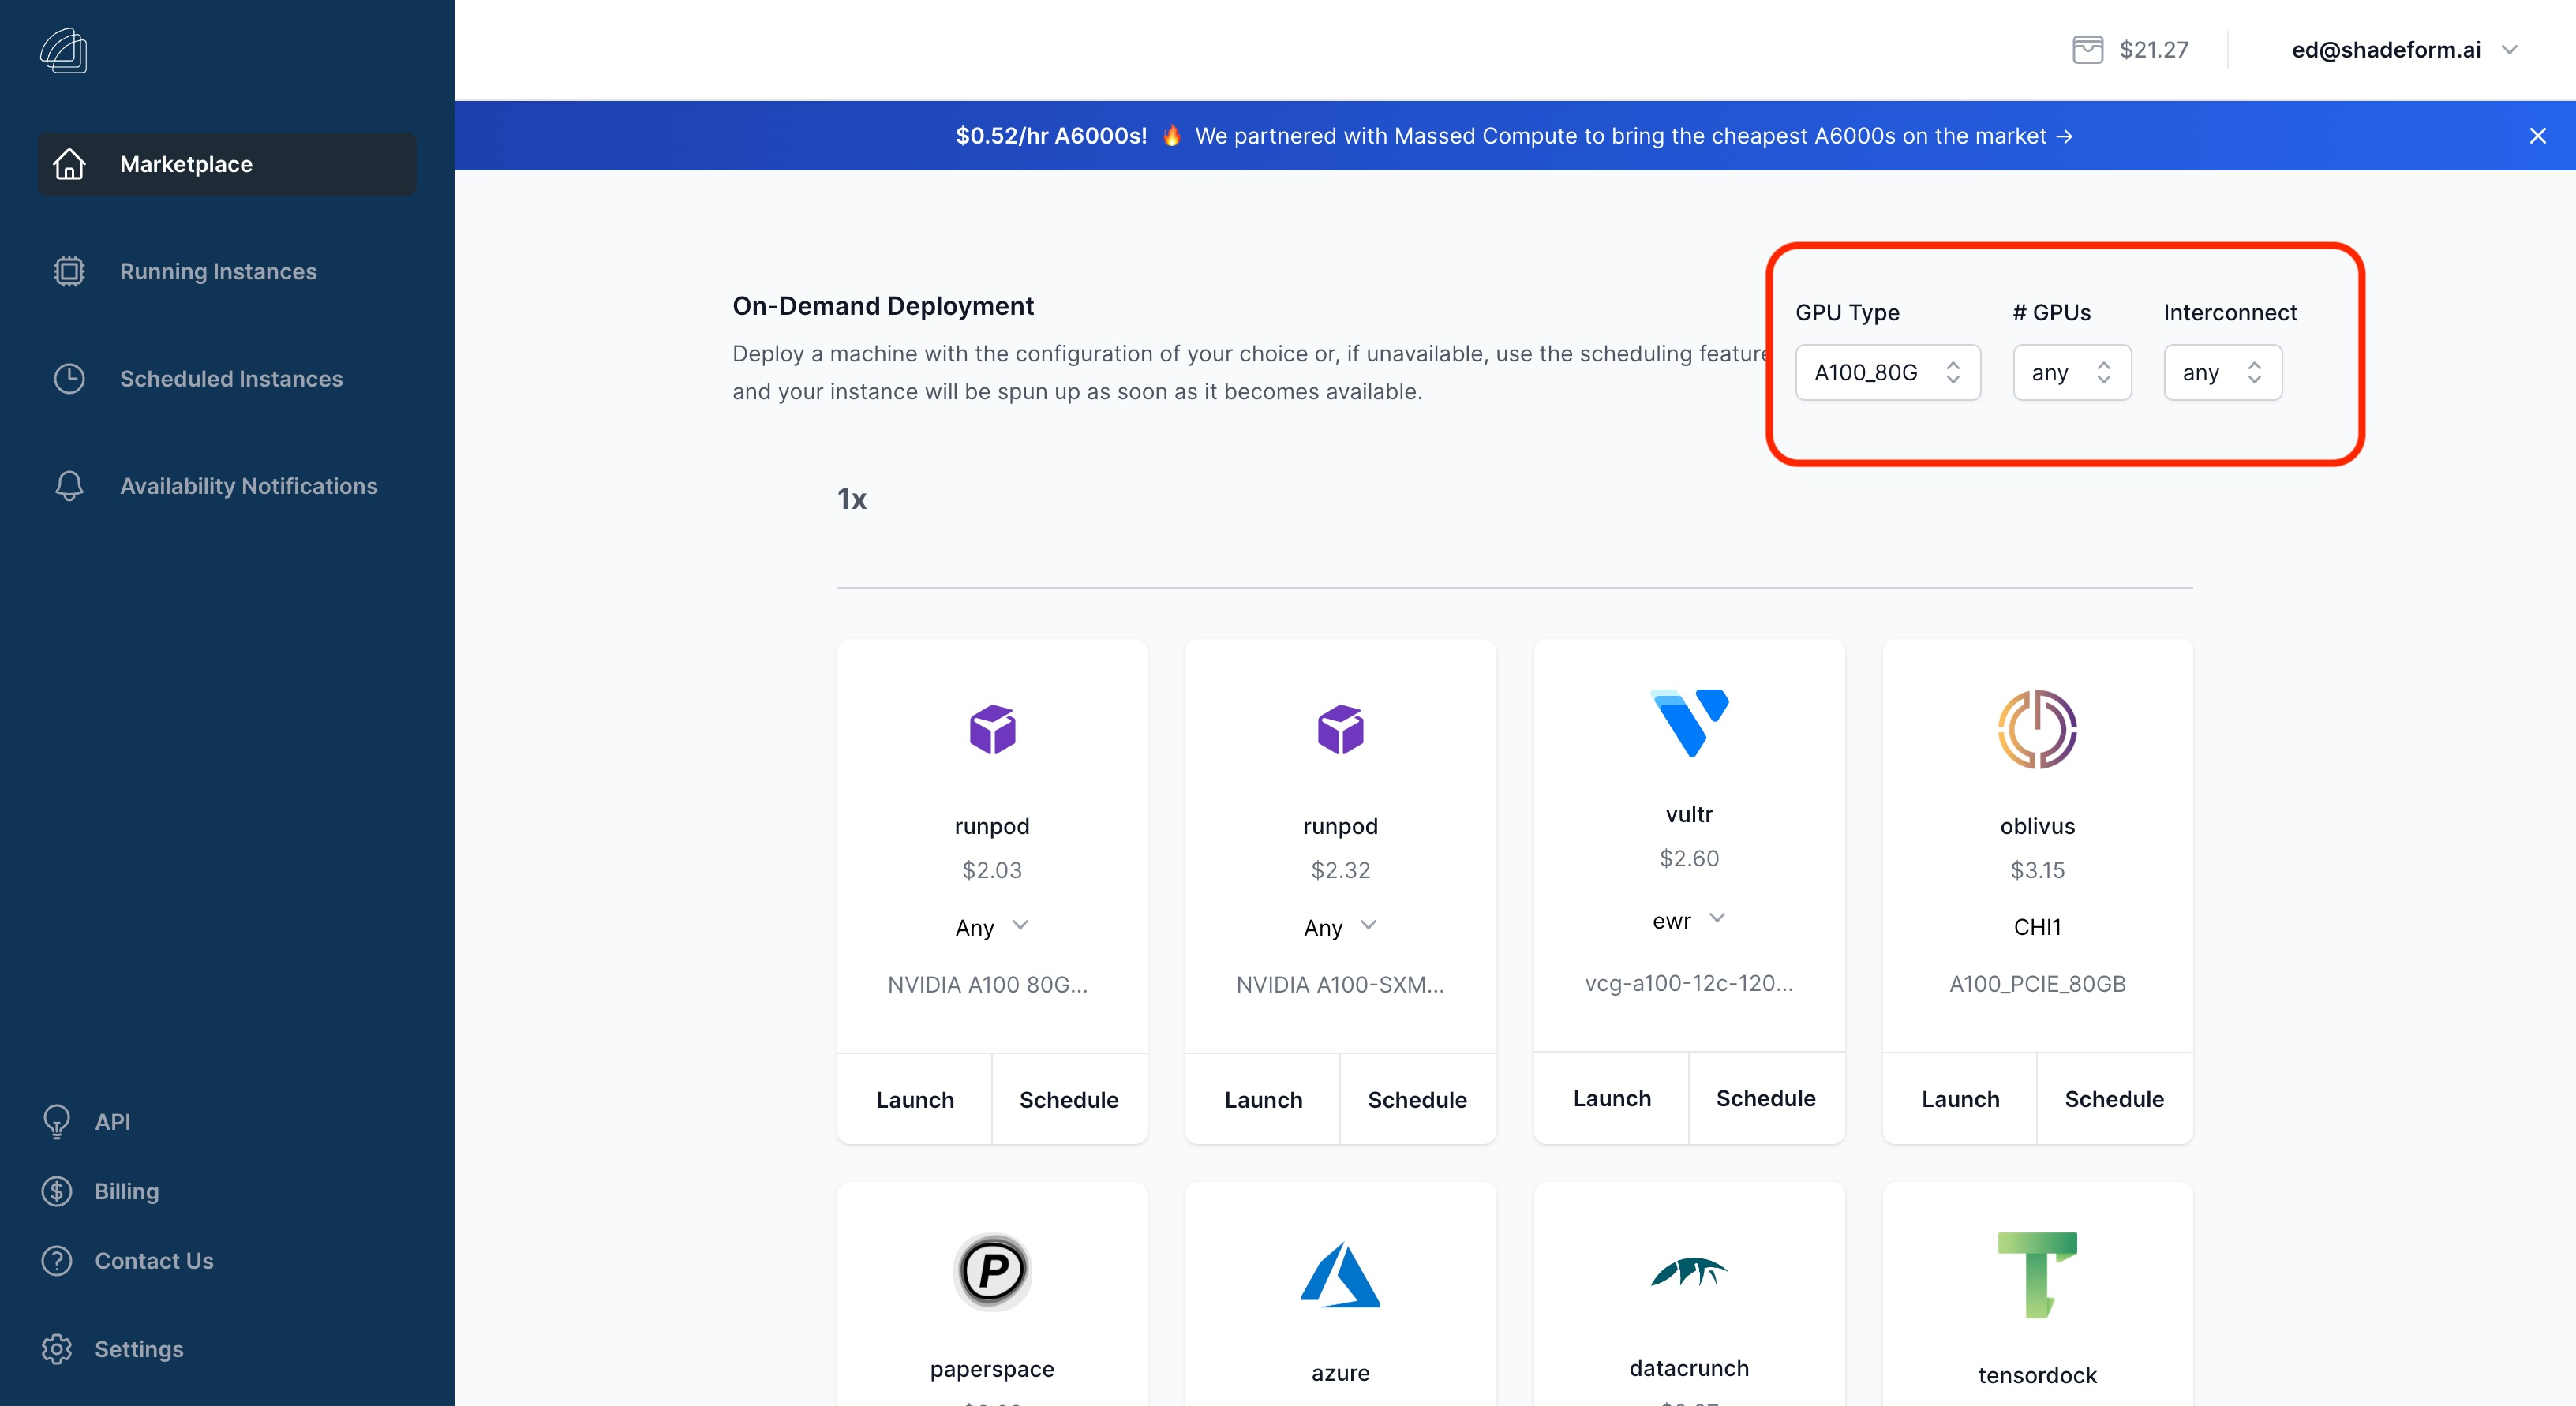
3. Launch your machine
After finding the GPU instance that you need, click on “Launch” to open the launch sidebar. On the sidebar, you can see additional information about the instance, select the operating system, name the instance, and confirm the launch.4. Add funds to your Shadeform Wallet
If this is the first time launching an instance, you’ll be prompted to load up your Shadeform Wallet displayed in the top right corner. By following the flow, you can add balance to your wallet via our Stripe integration. Additionally, you can configure Auto Top Up to automatically charge your payment method when your balance falls below the configured threshold.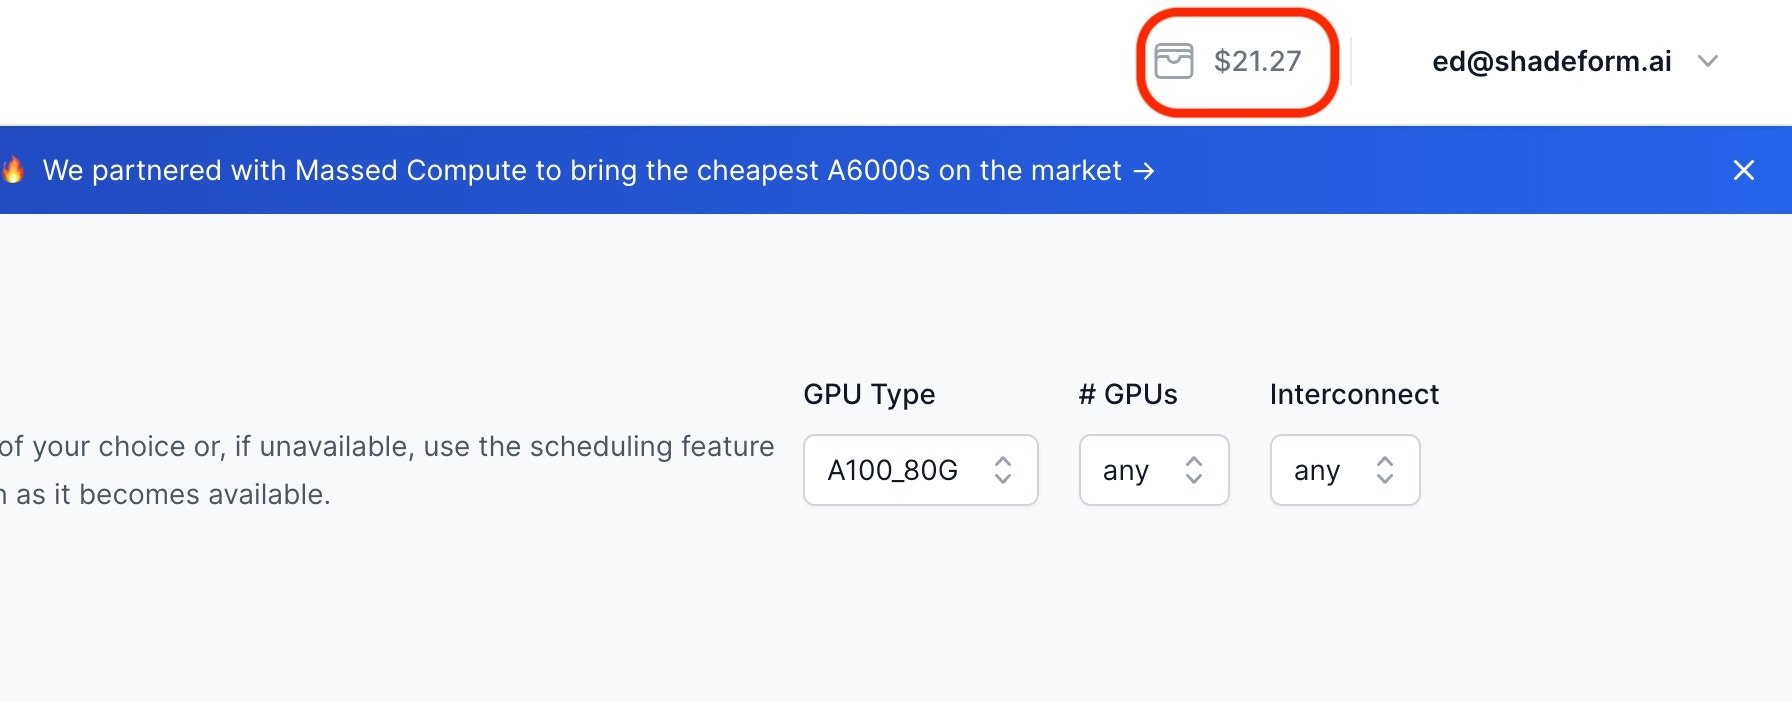
5. Access your machine
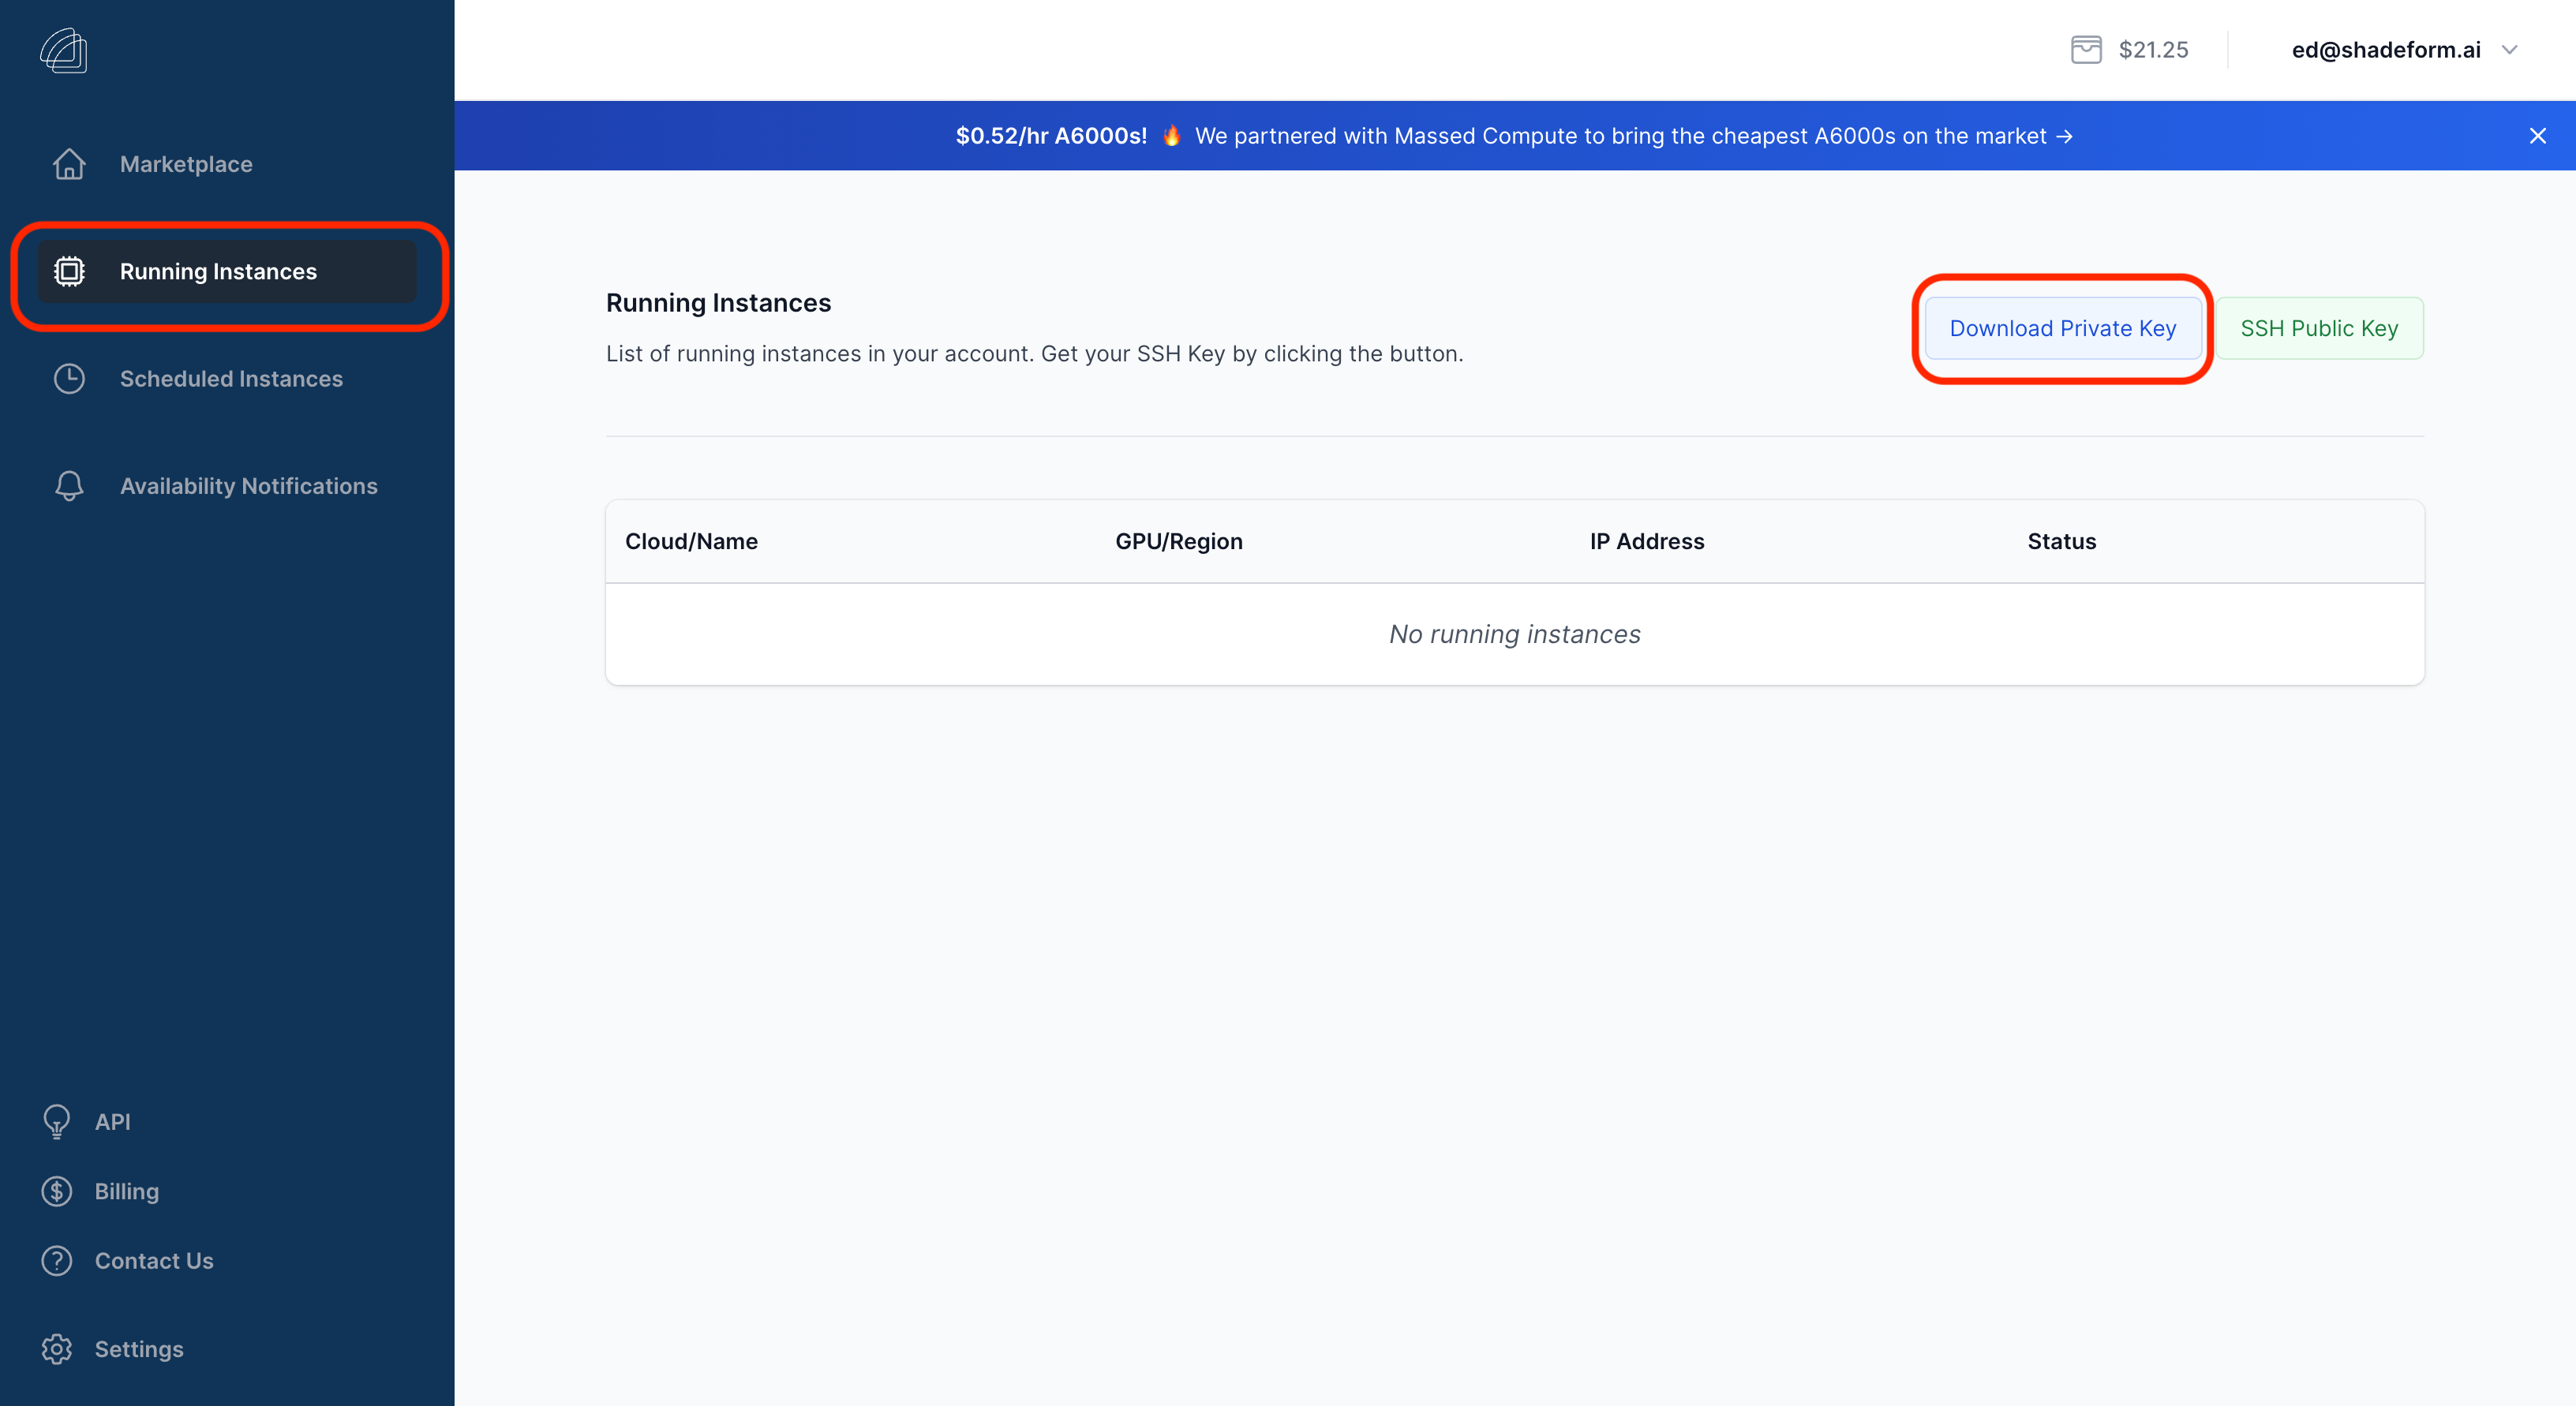
Once your Shadeform Wallet is funded, and the machine is launched, the machine will take some time to spin up. You can see the status of your machine on the “Running Instances” tab on the Shadeform sidebar. The machine may remain in the pending state for up to 10 minutes depending on the provider. Once the machine moves to the “Active” state, you can click on the machine to open up the info sidebar to get your SSH string to access the machine. In order to use the SSH string, you must first download your Shadeform private key. You can do so by clicking the “Download Private Key” button on the “Running Instances” page. After downloading the key, you must change the permissions of the private key by running “chmod 600 private_key.pem”. After changing the private key permissions, you can now use the Shadeform SSH string to access the machine.